 Pin It
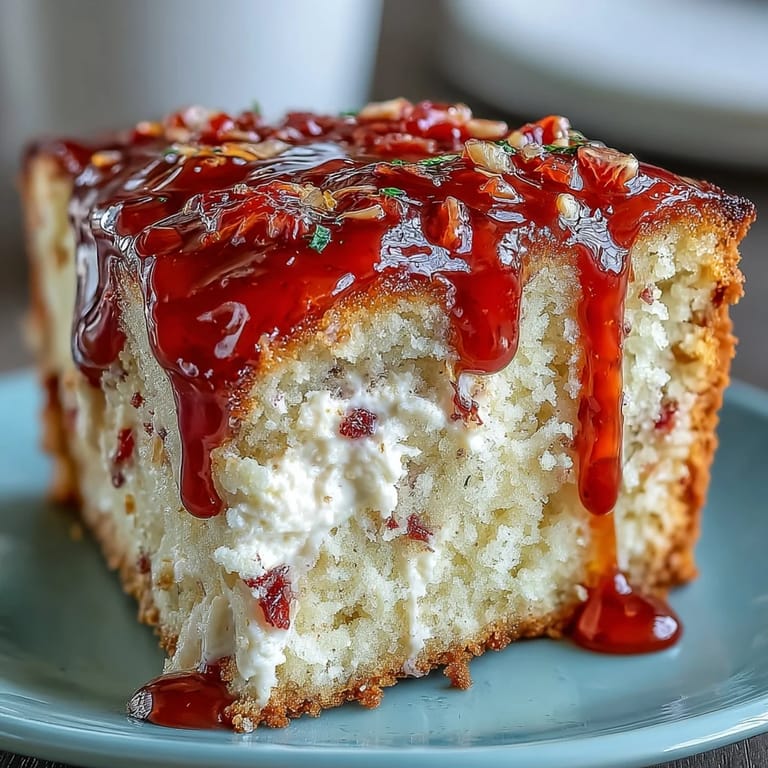
 The Saturday I brought this cake to my neighbor's brunch, nobody believed it was homemade. The ruby-streaked icing caught the morning sun through her kitchen window, and someone asked if I'd ordered it from a bakery downtown. I just smiled and sliced into the tender crumb, still faintly warm, releasing that unmistakable scent of citrus and vanilla. There's something about blood oranges that makes even a simple loaf feel like an occasion.
I started making this cake in late winter when blood oranges flood the farmers market for about six weeks. My daughter and I would stand at the counter zesting them together, her little hands holding the fruit steady while I worked the microplane. The juice would stain our fingertips pink, and she'd insist on taste-testing every step. Now she's the one who reminds me when blood orange season starts, asking if we can make the heavenly cake again.
Ingredients
- All-purpose flour: The base that gives structure without weighing down the tender crumb, measure it by spooning into the cup and leveling off.
- Baking powder: Fresh baking powder is key here, check the expiration date or your cake won't rise properly.
- Salt: Just a pinch balances the sweetness and makes the citrus pop even more.
- Plain Greek yogurt: Use full-fat for the richest texture, low-fat works but the cake will be slightly less moist.
- Granulated sugar: Whisked with the yogurt until it practically dissolves, creating a silky base for the batter.
- Large eggs: Room temperature eggs blend smoothly without deflating the batter, I set mine on the counter while I prep everything else.
- Blood orange zest: The aromatic oils in the zest carry more flavor than the juice, so don't skip this step.
- Blood orange juice: Freshly squeezed is worth it, bottled juice tastes flat and won't give you that ruby hue.
- Vanilla extract: A teaspoon of pure vanilla rounds out the citrus with a warm, sweet note.
- Coconut oil: Melted and cooled so it doesn't scramble the eggs, it adds a subtle richness and keeps the cake tender.
- Powdered sugar: Sift it for the icing or you'll end up with lumps no amount of whisking can fix.
Tired of Takeout? 🥡
Get 10 meals you can make faster than delivery arrives. Seriously.
One email. No spam. Unsubscribe anytime.
Instructions
- Prep the Pan:
- Preheat your oven to 350°F and butter every corner of a 9x5-inch loaf pan, then dust with flour or line with parchment for easy release. I learned the hard way that skipping this step means half your cake stays glued to the pan.
- Mix the Dry Ingredients:
- Whisk together the flour, baking powder, and salt in a medium bowl until evenly combined. Set it aside while you work on the wet ingredients.
- Combine Yogurt and Sugar:
- In a large bowl, whisk the Greek yogurt and granulated sugar together until the mixture is smooth and the sugar mostly dissolves. This takes about a minute of vigorous whisking.
- Add Eggs and Citrus:
- Whisk in the eggs one at a time, letting each one blend in before adding the next, then stir in the blood orange zest, juice, and vanilla. The batter will look bright and smell incredible.
- Fold in Dry Ingredients:
- Gently fold the flour mixture into the wet ingredients using a spatula, stirring just until no streaks remain. Overmixing develops gluten and makes the cake tough, so stop as soon as it comes together.
- Incorporate the Oil:
- Drizzle in the melted coconut oil and fold it through the batter until fully incorporated. The batter should look glossy and pourable.
- Bake the Cake:
- Pour the batter into your prepared pan, smooth the top with a spatula, and bake for 50 minutes or until a toothpick inserted in the center comes out clean. The top will turn golden and spring back lightly when touched.
- Cool Completely:
- Let the cake cool in the pan for 10 minutes, then turn it out onto a wire rack to cool completely before icing. Icing a warm cake will melt into a sticky mess.
- Make the Icing:
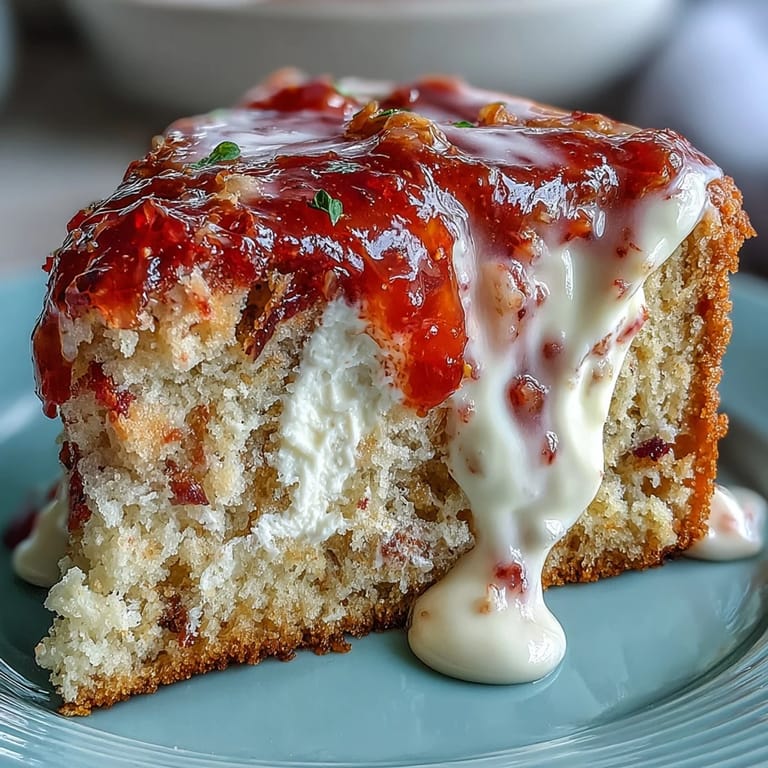
- Whisk together the powdered sugar, blood orange juice, and zest until smooth and pourable, adding a tiny splash more juice if it's too thick. Drizzle it over the cooled cake and let it set for at least 20 minutes before slicing.
 Pin It
 The first time I served this cake, my friend who claims she doesn't like yogurt in baking asked for the recipe before she'd even finished her slice. She kept saying it didn't taste like yogurt cake, it just tasted like the best citrus cake she'd ever had. I didn't tell her the secret until she'd had two pieces.
Choosing Your Blood Oranges
Look for blood oranges that feel heavy for their size, which means they're juicy inside. The skin color varies wildly from pale orange to deep crimson, but the real magic is inside where the flesh ranges from streaked to fully ruby. I always buy an extra one or two because sometimes you need more juice for the icing, and they're wonderful to snack on while you bake.
Storing and Serving
This cake stays moist at room temperature for two days if you cover it loosely with foil or a cake dome. After that, I move it to the fridge where it keeps for almost a week, though it never lasts that long in my house. Serve it plain for breakfast, or dress it up for dessert with a dollop of whipped cream and fresh raspberries on the side.
Swaps and Variations
If you can't find blood oranges, regular navel or Cara Cara oranges work beautifully, you just won't get that dramatic pink hue. Melted butter can replace the coconut oil for a more traditional flavor, and I've even made this with tangerines when I had a bag to use up. The yogurt is the one thing I wouldn't swap, it's what makes the crumb so tender and keeps the cake from drying out.
- Try adding a tablespoon of poppy seeds to the batter for a subtle crunch and classic pairing with citrus.
- Fold in a handful of fresh blueberries for bursts of sweetness throughout each slice.
- Swap half the blood orange juice in the icing for lemon juice if you want a sharper, tangier glaze.
 Pin It
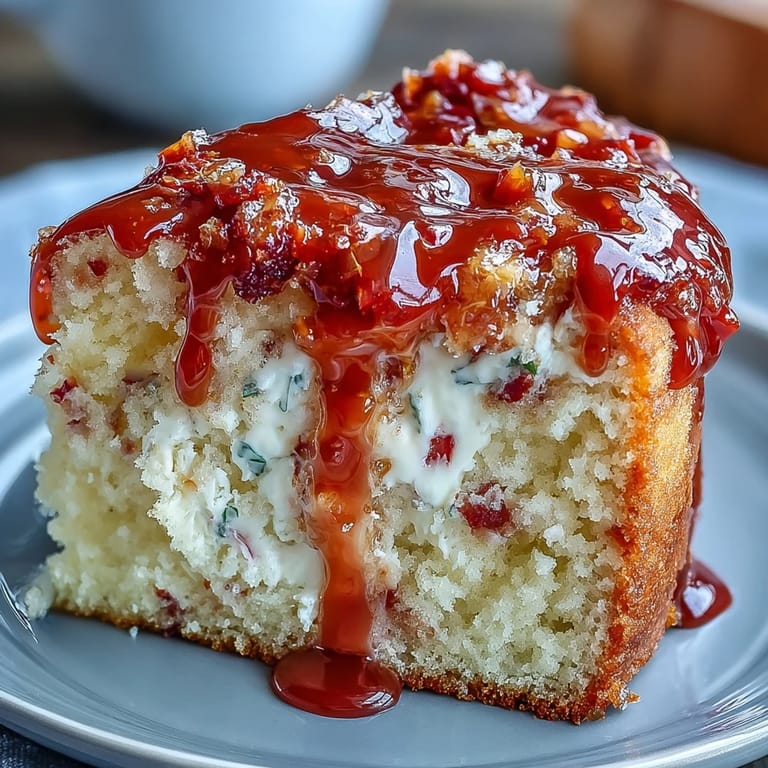
 Every time I pull this cake from the oven, the kitchen smells like a citrus grove in full bloom, and I'm reminded why I wait all year for blood orange season. It's the kind of cake that turns an ordinary afternoon into something worth remembering.
Recipe FAQs
- → What makes blood orange yogurt cake unique?
Blood oranges bring stunning ruby-red color and distinctive floral-citrus notes with raspberry-like undertones. Combined with creamy Greek yogurt, this cake offers exceptional moisture and a complex flavor profile you won't find in typical orange desserts.
- → Can I use regular oranges instead of blood oranges?
Yes, navel or Valencia oranges work perfectly. You'll lose the vibrant red hue and subtle berry notes, but the cake will still be deliciously moist and citrusy. Consider adding a drop of natural red food coloring to maintain the visual appeal.
- → How do I know when the cake is done baking?
Insert a toothpick into the center—it should come out clean or with just a few moist crumbs. The top will be golden-brown, and the edges will start pulling away from the pan slightly. The internal temperature should reach 200°F.
- → Can I make this cake dairy-free?
Substitute dairy-free yogurt for Greek yogurt and use melted vegan butter or refined coconut oil instead. The texture remains excellent, though the flavor profile may shift slightly depending on your yogurt alternative.
- → How should I store blood orange yogurt cake?
Keep covered at room temperature for up to 2 days. For longer freshness, refrigerate in an airtight container for up to 5 days. The flavors actually develop beautifully after a day. Bring chilled slices to room temperature before serving for the best texture.
- → Why is my cake dense or gummy?
Overmixing the batter develops too much gluten, creating a tough texture. Fold dry ingredients gently until just combined—some small lumps are fine. Also ensure your baking powder is fresh and that you measure flour correctly, spooning and leveling rather than scooping directly.